
This project focuses on practicing both the concepts we have seen about React and communication with APIs via HTTP requests. We will also introduce testing in front-end applications.
Github Link: https://github.com/ruivergani/dashboard-shop-web
In this lesson, we will create a React project called “pizzashop-web” using Vite. We will select the TypeScript option with ESBuild, which is Vite’s default. Then, we will install the dependencies using the “pnpm install” command and open the project in VSCode.
We will make some modifications, such as removing the readme, changing the application title to “pizzashop”, and removing the favicon and eslint.
We will also remove eslint-related dependencies and unnecessary CSS files. We will use a named export instead of export default to avoid import issues. Next, we will start creating the React project, focusing on using React Query for API requests.
1. Creating and Installing project, follow the process below:
ruiverganineto@Ruis-MacBook-Pro-M1-Max Rocketseat % pnpm create vite@latest
.../190f455e669-4d02                     |   +1 +
.../190f455e669-4d02                     | Progress: resolved 1, reused 0, downloaded 1, added 1, done
✔ Project name: … dashboard-shop-web
✔ Select a framework: › React
✔ Select a variant: › TypeScript

Scaffolding project in /Users/ruiverganineto/Desktop/Rocketseat/dashboard-shop-web...

Done. Now run:

  cd dashboard-shop-web
  pnpm install
  pnpm run dev

ruiverganineto@Ruis-MacBook-Pro-M1-Max Rocketseat % cd dashboard-shop-web
ruiverganineto@Ruis-MacBook-Pro-M1-Max dashboard-shop-web % pnpm install
ruiverganineto@Ruis-MacBook-Pro-M1-Max dashboard-shop-web % code .
2. Your folder structure should look like this:
1. Select Vite and follow installation procedures on the website (remember to use pnmp): https://ui.shadcn.com/docs/installation/vite
*Design CSS by copy-and-paste, basically the CSS Components made in TailwindCSS are not stored in the node modules, but instead are copied into the /src folder of the application, making it easier to customize.
ruiverganineto@Ruis-MacBook-Pro-M1-Max dashboard-shop-web % npx shadcn-ui@latest init
✔ Would you like to use TypeScript (recommended)? … no / yes
✔ Which style would you like to use? › Default
✔ Which color would you like to use as base color? › Zinc
✔ Where is your global CSS file? … src/global.css
✔ Would you like to use CSS variables for colors? … no / yes
✔ Are you using a custom tailwind prefix eg. tw-? (Leave blank if not) …
✔ Where is your tailwind.config.js located? … tailwind.config.js
✔ Configure the import alias for components: … @/components
✔ Configure the import alias for utils: … @/lib/utils
✔ Are you using React Server Components? … no / yes
✔ Write configuration to components.json. Proceed? … yes

✔ Writing components.json...
✔ Initializing project...
✔ Installing dependencies...

Success! Project initialization completed. You may now add components.

ruiverganineto@Ruis-MacBook-Pro-M1-Max dashboard-shop-web % pnpm dlx shadcn-ui@latest add button

Packages: +171
+++++++++++++++++++++++++++++++++++++++++++++++++++++++++++++++++++++++++++++++++++++++++++++++++++++++++++++++++++++++++++++++++++++++++++++++++++++++++++++++++++++++++++
Progress: resolved 171, reused 88, downloaded 83, added 171, done
✔ Done.In this lesson, we’ll set up ESLint and Prettier. It’s important to note that since we’re using TailwindCSS, we’ll need to install a few extensions. We’ll need to install the PostCSS extension and the TailwindCSS extension. Next, we’ll install Rocketseat’s ESLint and ESLint Config to have common code patterns. We’ll configure ESLint to use Rocketseat’s config for React projects. Then, we’ll install the Prettier extensions to organize Tailwind classes and imports. With everything set up, we can move on to building our app.
1. Install extensions in the VSCode such as PostCSS and TailwindCSS Intellisense.
2. Follow the procedures in the code below:
pnpm i eslint @rocketseat/eslint-config -D3. Create a file .eslintrc.json
{
  "extends": "@rocketseat/eslint-config/react",
  "plugins": [
    "simple-import-sort"
  ],
  "rules": {
    "simple-import-sort/imports": "warn",
    "prettier/prettier": [
      "warn",
      {
        "arrowParens": "avoid",
        "endOfLine": "auto",
        "semi": false,
        "singleAttributePerLine": true
      }
    ],
    "no-unused-vars": "off",
    "no-explicit-any": "off",
    "@typescript-eslint/no-explicit-any": "off",
    "@typescript-eslint/no-unused-vars": "off"
  }
}
4. This is how your package-json should look like:
{
  "name": "dashboard-shop-web",
  "private": true,
  "version": "0.0.0",
  "type": "module",
  "scripts": {
    "dev": "vite",
    "build": "tsc -b && vite build",
    "lint": "eslint . --ext ts,tsx --report-unused-disable-directives --max-warnings 0",
    "preview": "vite preview"
  },
  "dependencies": {
    "@radix-ui/react-slot": "^1.1.0",
    "class-variance-authority": "^0.7.0",
    "clsx": "^2.1.1",
    "lucide-react": "^0.416.0",
    "react": "^18.3.1",
    "react-dom": "^18.3.1",
    "tailwind-merge": "^2.4.0",
    "tailwindcss-animate": "^1.0.7"
  },
  "devDependencies": {
    "@rocketseat/eslint-config": "^2.2.2",
    "@types/node": "^20.14.12",
    "@types/react": "^18.3.3",
    "@types/react-dom": "^18.3.0",
    "@typescript-eslint/eslint-plugin": "^7.15.0",
    "@typescript-eslint/parser": "^7.15.0",
    "@vitejs/plugin-react": "^4.3.1",
    "autoprefixer": "^10.4.19",
    "eslint": "8.56",
    "eslint-plugin-simple-import-sort": "^12.1.1",
    "postcss": "^8.4.40",
    "prettier": "^3.3.3",
    "prettier-plugin-tailwindcss": "^0.6.5",
    "tailwindcss": "^3.4.7",
    "typescript": "^5.2.2",
    "vite": "^5.3.4"
  }
}
5. Install Prettier prettier-plugin-tailwindcss as a dev-dependency
npm install -D prettier prettier-plugin-tailwindcssThen add the plugin to your Prettier configuration:
// .prettierrc
{
  "plugins": ["prettier-plugin-tailwindcss"]
}
Also, add simple-import-sort plugin by clicking on this link.
Create app and auth folders in this project, containing dashboard.tsx and auth.tsx files respectively.
By using React Router DOM website and following the steps in createBrowserRouter, you will be adding the code below, in the routes file:
import { createBrowserRouter } from "react-router-dom"

import { Dashboard } from "./pages/app/dashboard"
import { SignIn } from "./pages/auth/sign-in"

export const router = createBrowserRouter([
  { path: "/", element: <Dashboard /> },
  { path: "/sign-in", element: <SignIn /> },
])
Note: we use createBrowserRouter because our application runs in the browser.
Your App.tsx file should look like this:
import "./global.css"
import { RouterProvider } from "react-router-dom"
import { router } from "./routes"
export function App() {
return <RouterProvider router={router} />
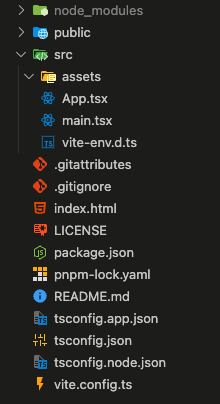
}Your project folder after this step should be looking like this:

In this lesson, we will configure layouts in React Router DOM. Layouts are useful when we have several pages in our application that follow the same visual structure. We will create two layouts: one for the internal pages and another for the authentication pages. Within these layouts, we will have a common header for all pages and the specific content of each page.
To do this, we will use the Outlet component of React Router DOM. In addition, we will organize the layouts in a folder called “layouts” inside the “pages” folder. This will make it easier to view and organize the files.
1. Create a folder called _layouts inside /pages containing app.tsx and auth.tsx files, and add the following code:
// app.tsx
import { Outlet } from "react-router-dom"

export function AppLayout() {
  return (
    <>
      <h1>Cabecalho</h1>
      <div>
        <Outlet />
      </div>
    </>
  )
}

//auth.tsx
import { Outlet } from "react-router-dom"

export function AuthLayout() {
  return (
    <>
      <h1>Autenticacao</h1>
      <div>
        <Outlet />
      </div>
    </>
  )
}
Modify the routes.tsx file to add the children’s code, each one will have its own Layout.
import { createBrowserRouter } from "react-router-dom"

import { AppLayout } from "./pages/_layouts/app"
import { Dashboard } from "./pages/app/dashboard"
import { SignIn } from "./pages/auth/sign-in"
import { AuthLayout } from "./pages/_layouts/auth"

export const router = createBrowserRouter([
  {
    path: "/",
    element: <AppLayout />,
    children: [{ path: "/", element: <Dashboard /> }],
  },
  {
    path: "/sign-in",
    element: <AuthLayout/>,
    children: [{ path: "/sign-in", element: <SignIn /> }],
  },
])In this lesson, we will install the React Helmet Async plugin, which allows us to change React meta tags, such as the title of each page. React Helmet Async is a fork of React Helmet and is better maintained. We will start by installing React Helmet Async and then we will add the Helmet Provider and the Helmet component to our application.
In the Helmet component, we can pass several properties that will be the document meta tags. We will add Helmet to the other pages of our application, such as Sign In and Dashboard, so that each page has a different title.
1. Install the package react-helmet-async
pnpm i react-helmet-async2. Modify the App.tsx
import "./global.css"

import { Helmet, HelmetProvider } from "react-helmet-async"
import { RouterProvider } from "react-router-dom"

import { router } from "./routes"

export function App() {
  return (
    <HelmetProvider>
      <Helmet titleTemplate="%s | Pizza Web Shop" />
      <RouterProvider router={router} />
    </HelmetProvider>
  )
}
Add the <Helmet title=”your-title”>
// sign-in.tsx
import { Helmet } from "react-helmet-async"

export function SignIn() {
  return (
    <>
      <Helmet title="Login" />
      <h1> SignIn </h1>
    </>
  )
}

// dashboard.tsx
import { Helmet } from "react-helmet-async"

export function Dashboard() {
  return (
    <>
      <Helmet title="Dashboard" />
      <h1> Dashboard </h1>
    </>
  )
}Check similiar articles below 🚀